Syntax Highlighters
Editing G-Code and macros by hand can be a difficult task. Whether it is knowing the syntax, or trying to find that one feed rate modifier in the list of G codes. We have decided to make this process a bit simpler. We created syntax highlighters for Notepad++ and VS Code to improve the legibility of these files. Syntax highlighters turn the block of plain black text into colored text based on the type of terms. This is commonly used in programming, and can greatly speed up navigating larger files.
G-Code
For G-Code, we have made the distinction between comments, line numbers, G codes, M codes, and parameters. A small comparison can be found below to compare the difference in legibility the highlighters offer.
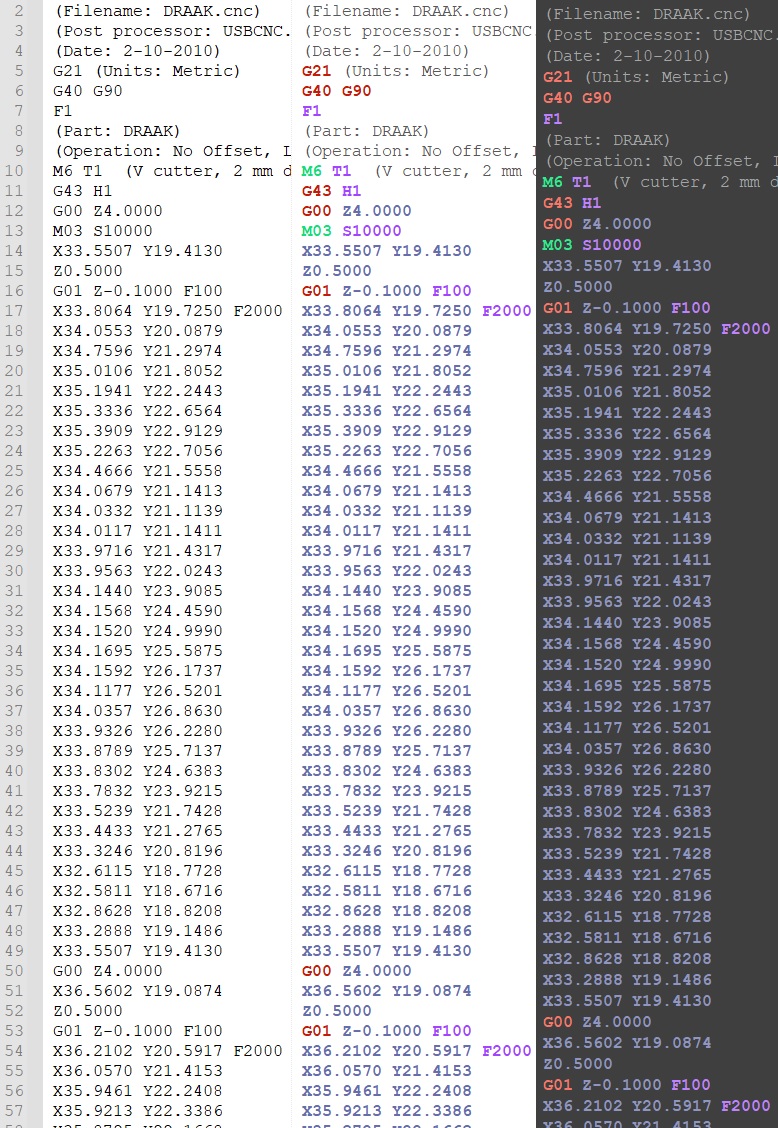
Comparison using Notepad++: plain text (left), our highlighter light theme (middle), and our highlighter dark theme (right)
Macro
Writing macros, especially as a beginner, can be a daunting task. Understanding the currently available macros can help when getting started, this is made easier by using syntax highlighting. But even more experienced macro users benefit from better legibility. As an example, look at the difference this makes to even a simple macro. The first image shows no highlighting, the second one uses the default VS Code theme, and the last one uses a more expressive theme.
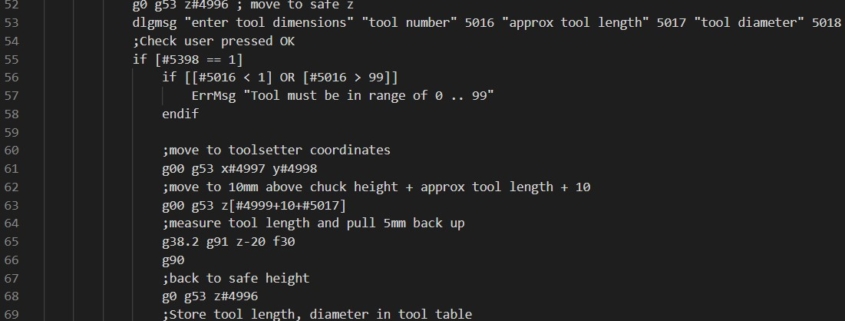
VS Code: No Highlighting
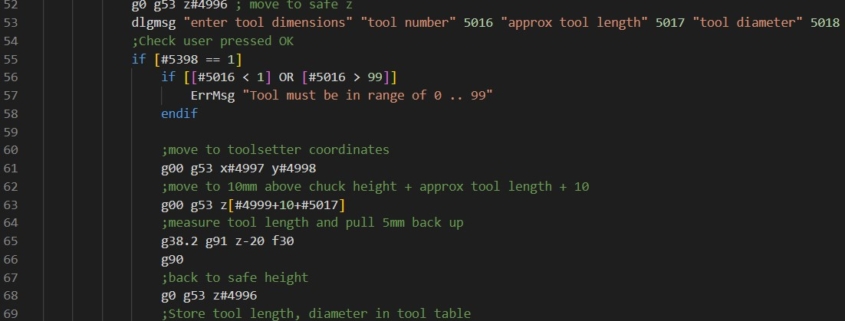
VS Code: Our syntax highlighter using the default theme
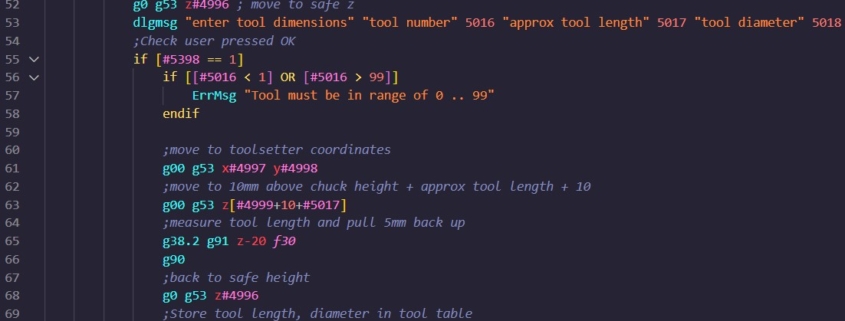
VS Code: Our syntax highlighter using a custom theme (SynthWave ’84, available from the visual studio store)
Installation
We offer syntax highlighters for Notepad++ and Visual Studio Code. If you do not have these installed yet, the installer for Notepad++ can be found here and can be installed on windows only. For a cross-platform solution, the installer for VS Code can be found here, this editor can be installed on Windows, Mac, and Linux.
It requires a few steps to install these syntax highlighters on the editor of choice, we discuss these below for the respective editors.
Notepad++:
- Download the Light mode and/or Dark mode themes
- In Notepad++, navigate to Language -> User Defined Language -> Open User Defined Language folder…
- Copy the chosen file into that directory.
After that, the file types need to be associated with this highlighter.
- Ensure one file of the desired extensions (.nc .cnc .ngc .gc .tap .gcode .ncp) is open.
- Navigate to Language and select Eding CNC Dark Theme or Eding CNC Light Theme based on the currently active theme.
- The text should now have changed to the chosen colors. This setting applies to all files of the same file extension.
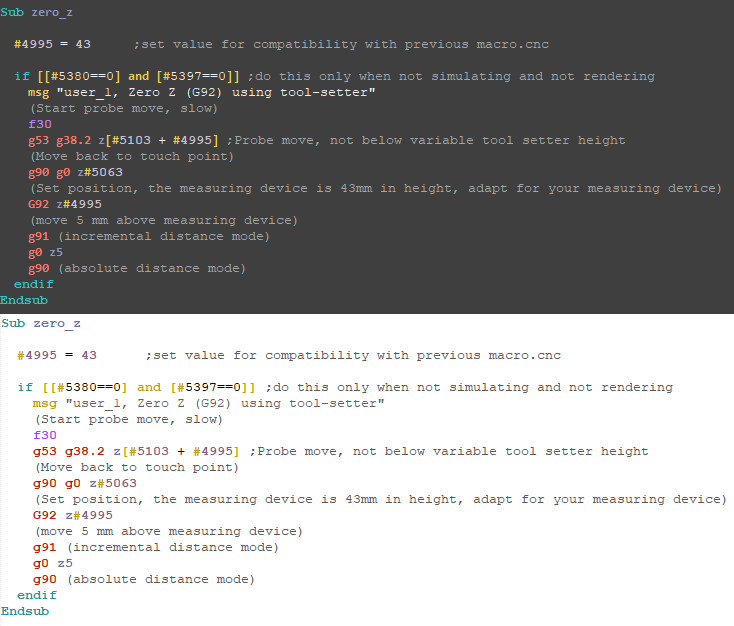
Eding CNC Dark Theme (top) and Eding CNC Light Theme (bottom)
Visual Studio Code:
- Navigate to the Extensions window (Ctrl + Shift + X on windows)
- Type in “Eding CNC G-Code & Macro“
- Click install
After that, the file types need to be associated with this highlighter.
- Click Plain Text in the bottom right corner of the screen
- Select G-Code from the dropdown
- The text should now have changed to the chosen colors. This setting applies to all files of the same file extension.
Please note that Visual Studio Code syntax highlighting is influenced by your current theme, so it may look different on your computer. Optionally, you can install a custom theme that has more different colors, the effect of which can be seen below.
- Navigate to File -> Preferences -> Theme -> Color Theme
- Use the up and down arrow keys to try included themes or click “Browse Additional Color Themes” to view community-made themes.
- Click the desired theme. The colors should have changed to represent the choice.

Default VS Code Theme (top) and Custom SynthWave ’84 Theme (bottom)
