How to combine mismatched sensors to your CNC equipment?
You have just ordered that brand new sensor for your CNC machine, but when you have received it, you find out it is not compatible with your existing sensors! Avoid this now by using the SensorHUB.
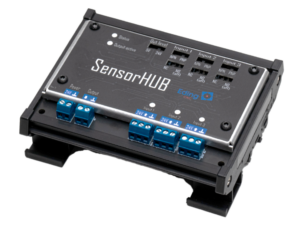
What is the SensorHUB?
The SensorHUB allows you to conveniently mix and match sensors for applications like measuring tool length or finding a position or any applications.
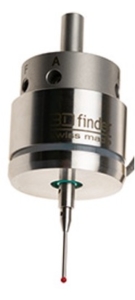
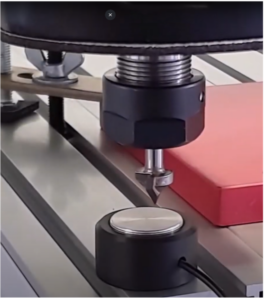
3D sensor Tool length measurement sensor
Two important characteristics that are often overlooked when combining them are:
- Is it a NPN or PNP type?
- Is a normally open (N.O.) or normally closed (N.C) version?
Combining these different types of sensors can be a nightmare. This often happens when upgrading your CNC machine with a new sensor.
The SensorHUB can be used to easily overcome or avoid these issues.

Connecting sensors
The SensorHUB requires only one 24V power connection, through this connector the sensors are also supplied with power. Each sensor is connected to one of the inputs. Next, for the connected sensor the input can be configured to NPN/PNP and Normally (N.O.)/Normally Closed (N.C.) type. When the sensor is now activated a blue LED above the sensor output will show this, making it very easy to test your sensor.
At the same time the output activity is shown by a blue LED at the left top. Notice that the output level can also be configured to be a 5V or 24V level output level. This means that it is compatible with all our current CNC controllers:
- CNC310
- CNC530 (coming soon)
- CPU5A4(E)
- CPU5B (End-of-life)
- CNC720
- CNC760
- CNC600
But it is very likely that it will also function with other controllers out there.
Tips on using SensorHUB
We advise you to configure it in such a way that the SensorHUB’s output is active when no sensor is activated. This might sound strange. However, this can be very useful for several reasons:
- Our controllers only check for level changes, so it does not matter if the SensorHUB output is active or not.
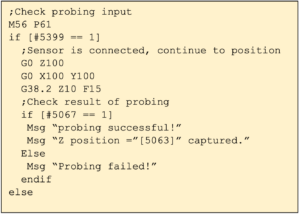
- You can detect if the connection between our CNC controller and the SensorHUB is lost, avoiding possible damage to your CNC equipment. This test is very simple thanks to our macro language; you can check the probe input on whether it is high like this:
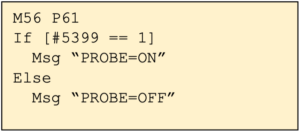 If you use a removable sensor, you can show a message that warns the user to first connect the sensor before continuing.
 - By using the configuration options of the SensorHUB the attached sensor inputs can also be configured so that the SensorHUB can also detect if any of the attached sensors are disconnected for any reason and indicate this missing sensor to the CNC controller.
How to use the probing input?
Finally, a small example on using the probing input on our controllers.
Probing is done by using the command G38.2. This command can be given by activating the MDI dialog and enter this command, in this case we want to a probing to X position 100. The probing will stop either when it detects a level change on the probe input or reaches that position.
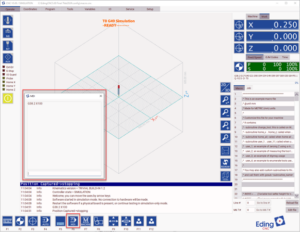
Please check the syntax of G38.2. These kinds of movements should not be done with a feed rate that is too high, causing potential damages. The feed rate can be indicated as a separate parameter.
The results can be found on the ‘Variables’ tab:
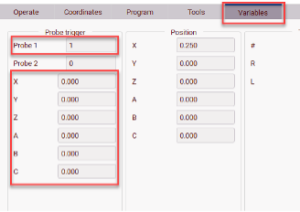
This shows if a level change was detected by showing the ‘1’ (= succesful) or ‘0’ (= failed). If it was successful it will have captured that position and shown in its related box (X,Y,Z,A,B,C).
We show a simple macro that can be used by an EdingCNC controller.
More information
More information about the SensorHUB can be found here:
Product page (https://edingcnc.com/product/sensorhub/)
Manual (https://docs.edingcnc.com/Hardware/sensorhub)
Presentation Video (https://www.youtube.com/watch?v=_ofbLWQxyOE)
Video – Setup & Configuration
Video – Connecting to CNC760

